Plant propagation is the process which grows new plants from a variety
of sources: seeds, cuttings, and other plant parts. Plant propagation
can also refer to the man-made or natural dispersal of seeds.
Learn more on Wikipedia.
Propagation for Beginners
We're going to focus on water propagation, which is a form of asexual reproduction. A piece of stem or root of the source plant is placed in a suitable medium (in this case: water). If the the conditions are right, the piece will begin to grow roots as a new plant independent of the parent plant.
What You'll Need
- Plant to Propagate
- Scissors (clean & sharp!)
- Glass Vessel (filled with room temperature tap water)
STEP 1
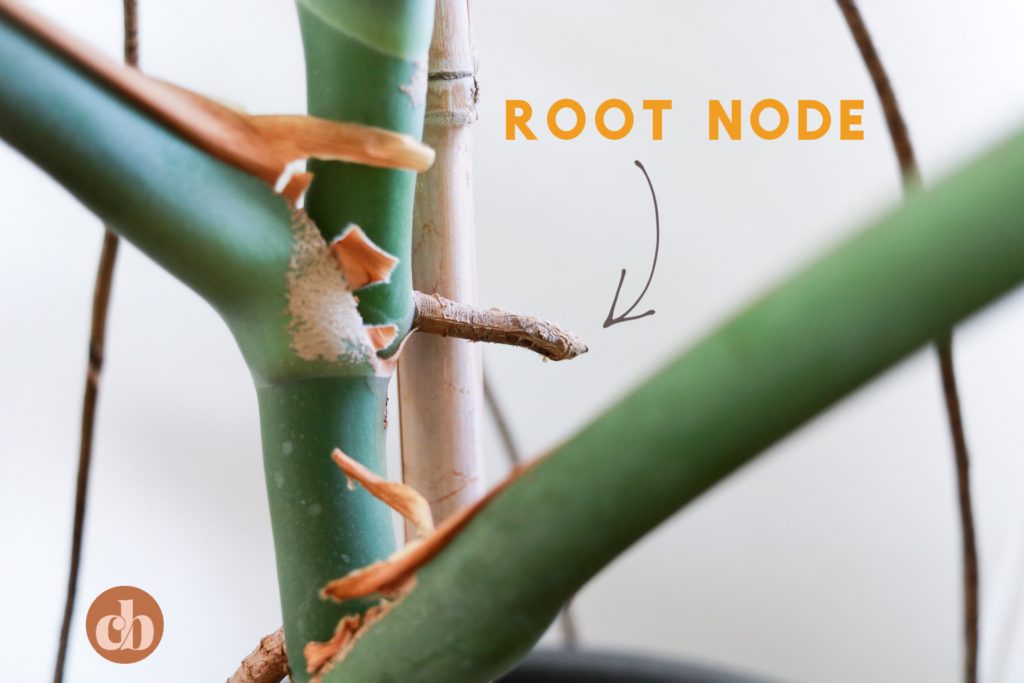
On a mature vine, look right below the leaf or stem/vine juncture for a
tiny brown root node. This is usually located on the opposite side of a
leaf sprout. These tiny bumps are the key to propagating.
You’ll want to snip off a couple inches of healthy stem right before a
node and include a node or two with the cutting, as this is where the
new roots will come from. I like to cut 1 inch above and below each
node. This will allow me to create more roots. When it's time to repot
in a nursery pot, it will give me more stems/roots to pot with and
create a fuller looking pot.
STEP 2

We're using a glass vessel here so we can monitor root growth from the nodes. Remove any leaves too close to the node, especially ones that may end up submerged under water when you put your cutting into your glass vessel. This could cause rotting and since most of the energy is going to be absorbed through the one node, you don't want to allocate energy towards a rotting stem/leaf.
STEP 3

Place your plant cutting(s) in your glass vessel and put it in a spot
that receives bright to moderate indirect light. Do not place in strong,
direct light or super-low light. Strong, direct light could overwhelm
your plant and in some cases burn the leaves.
Learn more on plant's light needs from The Sill.
STEP 4
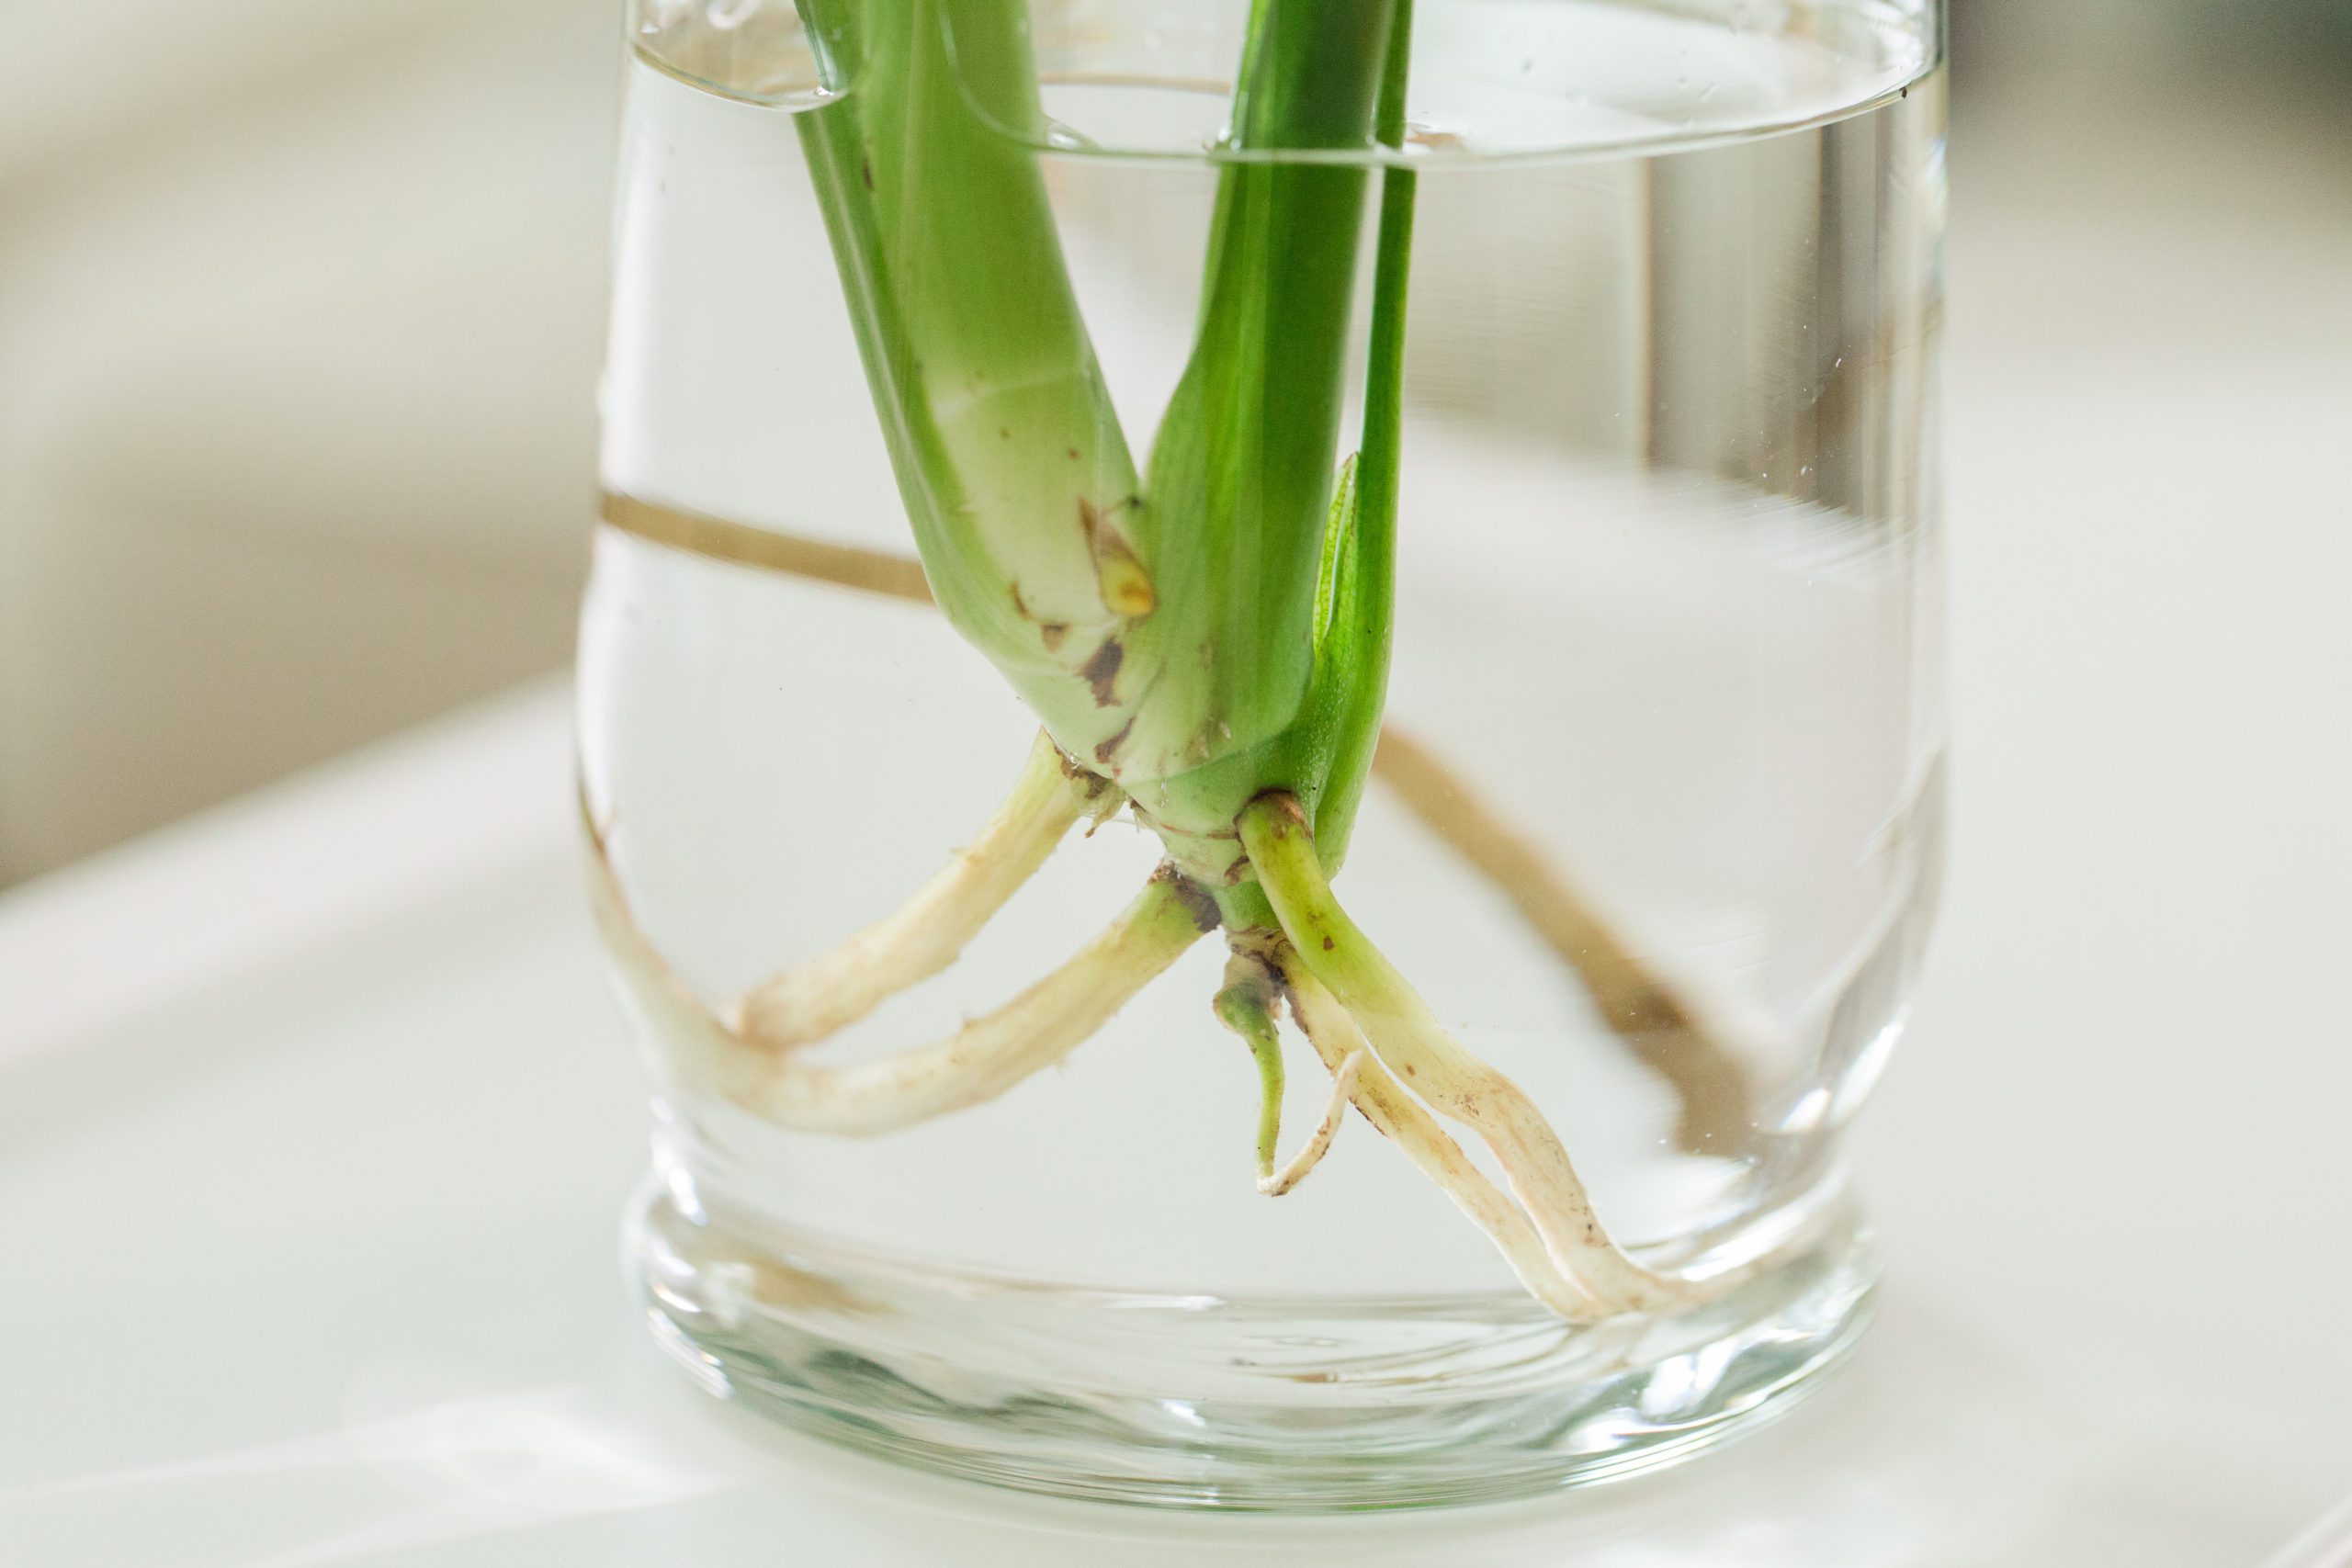
Now, it's time to sit back and test our patience! On a weekly basis, monitor the plant to check root growth from the node and the water. You can replace the water every few days, or top off your glass with fresh, tepid water when it's looking a little low (as long as the water is not murky or has fungi growing). If the water is murky, it is recommended to replace the water for the health of the growing root system.
STEP 5

Once the roots are 1 inch long or longer, you can consider transplanting
your propagated plant cutting into a planter with potting mix. This
should take 4-6 weeks. Once the roots of the cutting are potted in resh
potting mix, saturate the mixture with room temperature water and place
in bright, indirect light. Let the potting mix dry out between watering.
Please note that the roots that have developed in water are different
than roots developed in soil. "Water roots" are fragile and may die off
during the process of coverting them into "soil roots".
It is best to introduce soil gradually if you can by making a 50:50
mixture of water and soil to place the cutting in. Increase the amount
of soil daily until you've got an average potting mixture. If you've
gone from water to straight soil without acclimating, the roots may not
be able to take in adequate moisture as it is acclimating to soil and
may cause wilting. Sometimes just waiting it out is all you can do but
you can also create a humidity dome to help.
Learn more about potting plants from The Sill.
sources:
fieldnotes by studioplants
|
The Sill
|
Wikipedia